

TL;DR:
- Knowing your skin type allows you to choose effective, tailored skincare products and avoid unnecessary irritation.
- Performing simple at-home tests, like the day or wash test, helps accurately determine your skin’s natural behavior.
You have probably stood in a pharmacy aisle or scrolled through an online store, feeling completely overwhelmed by the number of products staring back at you. You pick one, use it for a few weeks, and nothing really changes. Or worse, your skin reacts badly. This frustration is more common than you think, and it almost always comes down to one simple problem: not knowing your actual skin type. When you know your skin type, you stop guessing and start choosing products that genuinely work for you. This guide gives you two practical at-home tests, step-by-step instructions, and clear guidance on what to do with your results.
Table of Contents
- What you need to get started
- Step-by-step guide: Two simple tests for skin type
- What to do if results are unclear or your skin seems sensitive
- How to use your results for a minimalist, effective skincare routine
- Why your skin type isn’t set in stone—and how to keep it simple
- Find the right products for your skin type—without the guesswork
- Frequently asked questions
Key Takeaways
| Point | Details |
|---|---|
| Simple at-home tests | You can identify your skin type easily with a day test or wash test using items you have at home. |
| Skin can change | Recheck your skin type when your environment, stress, or routine changes for the best results. |
| Sensitive signs matter | Seek expert advice if you experience ongoing redness, itching, or unclear results after testing. |
| Fewer products, better results | Knowing your skin type lets you build a simple, targeted routine and avoid unnecessary steps. |
What you need to get started
Now that you know why identifying your skin type matters, let’s gather what you need to get started.
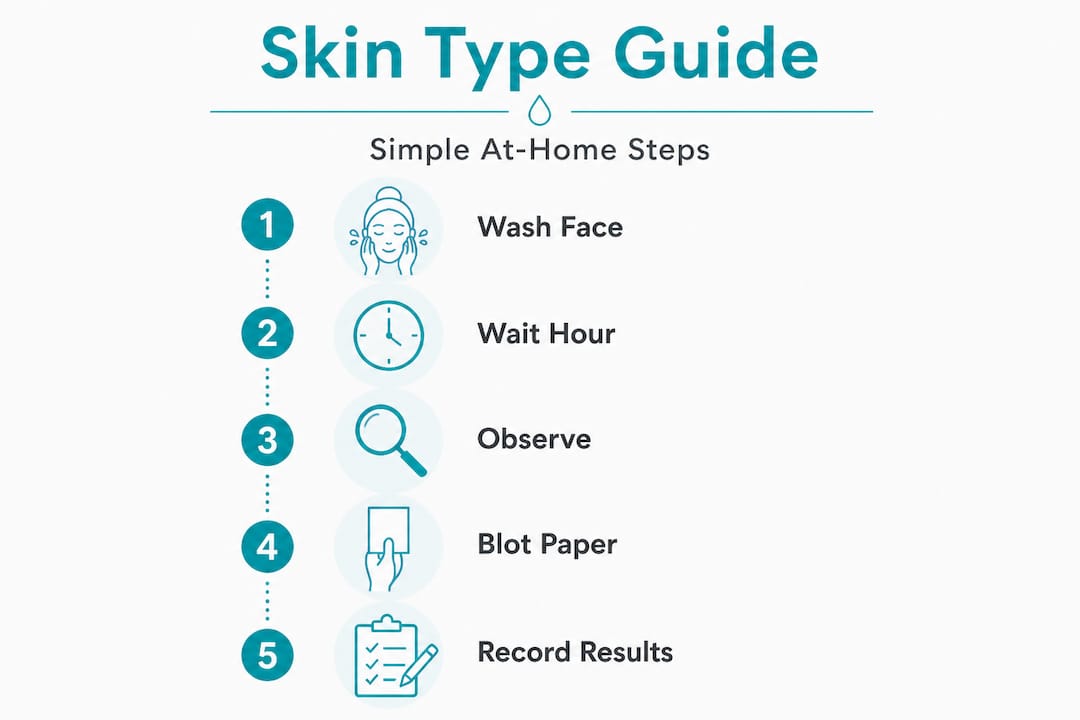
The good news? You do not need a lab, a dermatologist’s appointment, or expensive diagnostic tools. Most of what you need is already in your home. Getting prepared before you test means your results will actually reflect your skin’s real behaviour rather than an outlier day.
Here is what to have on hand:
- A gentle, fragrance-free cleanser to wash your face without stripping or irritating it before the wash test
- A clean, soft towel to pat your face dry without rubbing or adding friction
- A mirror in good lighting, ideally natural daylight, so you can clearly observe shine, texture, and redness
- Blotting paper or tissue to check oil levels across different zones of your face
- A notepad or phone to jot down observations throughout the day
- Bare skin for at least one to two hours before and during the test, meaning no moisturiser, serum, or sunscreen applied
Understanding your skin in its natural state is the only way to get an honest reading. Following the everyday skincare essentials principle of keeping things simple is exactly right here too.
At-home skin type identification works by observing how your skin behaves across a typical day, making it accessible and surprisingly accurate when done correctly.

There are two main DIY methods we recommend. Here is a quick comparison:
| Method | How it works | Time needed | Best for |
|---|---|---|---|
| Day test | Observe skin from morning to evening with no products | 6 to 8 hours | Most people, any skin tone |
| Wash test | Cleanse and observe how skin feels within 30 minutes | 30 to 60 minutes | Those who want faster results |
Both methods are effective. If you have the time, the day test gives you a more complete picture. If you want quicker clarity, the wash test still delivers reliable results.
Step-by-step guide: Two simple tests for skin type
Once your tools and materials are ready, it’s time to run the tests and observe your skin’s natural behaviour. Follow these numbered steps carefully for each method.
The day test
- Wake up and wash your face with your usual gentle cleanser. Pat dry and apply nothing else. No moisturiser, no SPF, nothing.
- Wait one hour, then check your face in a well-lit mirror. Note how it looks and feels. Is there any shine? Any tight or dry patches?
- Go about your normal morning without touching your face unnecessarily.
- At midday (around four to six hours later), use a piece of blotting paper or a clean tissue and gently press it against your forehead, nose, chin, and each cheek.
- Hold the paper to the light. Look for oily spots on the tissue.
- By late afternoon or evening, take a final look. Check for shine, flakiness, redness, or any areas that feel uncomfortable.
The day test is about tracking your skin’s natural progression across a full day, which gives you a much more honest picture than a single snapshot.
The wash test
- Wash your face with a gentle, fragrance-free cleanser and warm water. Use no other products.
- Pat dry gently and wait 30 minutes without touching your face.
- Observe and note how your skin feels. Does it feel tight, comfortable, or greasy?
- At the 30-minute mark, press blotting paper on different zones of your face.
A second at-home method like this wash test helps you understand your skin type by seeing how quickly oil or discomfort returns after cleansing.
Reading your results
| What you observe | Likely skin type |
|---|---|
| Shine all over, oily blotting paper | Oily |
| Tight, flaky, or uncomfortable feeling | Dry |
| Comfortable, no major shine or tightness | Normal |
| Shiny T-zone (forehead, nose, chin) but matte cheeks | Combination |
| Redness, stinging, or strong sensitivity after cleansing | Sensitive |
Pro Tip: Run these tests on a completely typical day. Avoid testing after a workout, a long flight, a stressful week, or right after trying a new product. Any of these can temporarily change how your skin behaves and skew your results. If you are trying to detoxify your skin at home, wait until after that reset period before testing so your baseline is accurate.
Building a simple skin routine starts with knowing exactly what you are working with, and these two tests give you that foundation.
What to do if results are unclear or your skin seems sensitive
Even with clear instructions, sometimes your results may be mixed. Here is how to troubleshoot and adapt.
Some people complete both tests and still feel unsure. That is completely normal. Skin does not always fit neatly into a single category, and several factors can muddy the water.
Common reasons for unclear results include:
- Testing on an unusually hot or cold day, since temperature affects oil production and moisture levels
- Recently changing products, especially those with actives like retinol, acids, or strong exfoliants
- Hormonal fluctuations during your menstrual cycle or due to stress
- Using a cleanser that is too harsh, which strips the skin and mimics dryness even in oily skin types
- Recent illness, dehydration, or significant changes in diet
If your results feel inconsistent, the best step is simply to wait a few days and retest. Choose a genuinely average day in your routine, with no new products, a normal sleep schedule, and stable weather conditions.
Pro Tip: If you have recently travelled or moved to a different climate, give your skin at least two weeks to adjust before testing. South African weather varies significantly between regions, and your skin will respond differently in Cape Town’s winter versus Johannesburg’s dry summer. Skin behavior can shift with climate, hormones, and product use, so single-day results taken at the wrong time can be genuinely misleading.
Signs your skin may be sensitive and not just a temporary reaction:
- Persistent redness that does not resolve
- Stinging or burning with most products, even gentle ones
- Regular flare-ups after sun exposure, wind, or temperature changes
- Frequent itching without a clear cause
If you are seeing these skin sensitivity solutions may be what you need to explore before committing to any new products.
Important: Do not ignore persistent redness, itching, or severe irritation. These may signal an underlying condition like rosacea, eczema, or a contact allergy rather than a simple skin type characteristic. If you are unsure, a dermatologist can help you distinguish between skin type and a skin condition.
When symptoms are unusual or severe, expert evaluation can help distinguish your skin type from irritation or an underlying condition, saving you time, money, and unnecessary discomfort. Knowing the signs your skin is healthy can also help you recognise when something feels genuinely off and when your skin is simply adjusting.
How to use your results for a minimalist, effective skincare routine
Now that you know your skin type, here is how to use that knowledge for simpler, better skincare with less stress.
Identifying your skin type is only useful if it shapes what you actually do next. The real goal is to match your products and habits to your skin’s genuine needs, without overcomplicating things.
Here is a straightforward process to follow:
-
Choose one cleanser suited to your skin type. Oily skin benefits from a foaming or gel cleanser. Dry skin does better with a creamy or oil-based formula. Normal and combination skin often work well with a gentle, balanced cleanser that does not strip or over-moisturise.
-
Select a moisturiser that matches your results. Dry skin needs richer, more occlusive formulas. Oily skin still needs hydration, but a lightweight, non-comedogenic (meaning it won’t block pores) moisturiser works better. Combination skin may benefit from applying lighter product to oily zones and richer product to dry zones.
-
Always use SPF during the day, regardless of your skin type. Sun damage is the leading cause of premature ageing, and skin type identification helps you pick an SPF that feels comfortable rather than heavy or greasy.
-
Resist the urge to layer. One of the biggest mistakes people make is believing that more products mean better results. Over-layering can irritate the skin, disrupt its natural balance, and actually make things worse. A cleanser, a moisturiser, and an SPF is a complete, effective routine for most people.
-
Adjust as needed, not constantly. If your skin changes with the seasons or during a particularly stressful period, make small, intentional adjustments. Swap your moisturiser for something richer in winter, for example. But avoid overhauling everything at once.
When you are choosing skincare products, your skin type acts as a filter. It helps you immediately rule out products that are wrong for you and confidently invest in the ones that make sense. That saves money, reduces waste, and gets you results faster.
Understanding skin health at a foundational level means you stop chasing trends and start making informed decisions. The skin is a dynamic organ, and knowing its baseline behaviour puts you in control.
Why your skin type isn’t set in stone—and how to keep it simple
Here is an honest, professional perspective before you reorganise your entire bathroom shelf.
We see it all the time. Someone does a skin type test, gets a result, builds a routine around it, and then feels lost six months later when their skin seems to behave differently. They assume the test was wrong. In reality, their skin simply changed.
Skin type is a useful starting point, not a permanent label. A teenager with oily skin may have normal or even dry skin by their thirties. Someone living in Durban’s humidity may have combination skin, while the same person visiting the Karoo in July might read as dry. Hormones, age, diet, stress, and even the water you wash your face with can all shift your skin’s behaviour over time.
The biggest mistake we see is treating your skin type as a fixed identity and then building an overly complex routine around it. People buy a serum for oiliness, a cream for dry patches, a toner for sensitivity, an exfoliant for texture, and a mask for brightness. Before long, there are twelve products on the shelf, and the skin is more confused than ever.
The truth is that consistency with a few well-chosen products outperforms complexity almost every single time. Following a minimalist skin cycling approach, where you rotate a small selection of effective products rather than layering endlessly, gives your skin the stability it needs to genuinely improve.
Retest seasonally. Adjust one product at a time. Trust the process. That is the approach that actually works over the long term.
Find the right products for your skin type—without the guesswork
Ready to put your new insights into practice? Here is where to start with simple, effective skincare tailored to your results.
Once you know your skin type, the next step is pairing that knowledge with products that genuinely deliver. We have made that as straightforward as possible at SMPL SKIN South Africa.
A great place to start is the Gentle Cleanser & SPF 15 Moisturiser Duo. This combination works for most skin types, gives you a clean foundation, and builds a daily SPF habit without the greasy finish. It covers the two most essential steps in any routine: cleansing and protection. Whether your results pointed to normal, dry, combination, or slightly oily skin, this duo is a confident, no-fuss starting point. Browse our full range to find targeted options that match exactly what your skin told you.
Frequently asked questions
How often should I re-check my skin type?
You should retest whenever seasons change, your hormones shift, or your routine changes significantly, since skin behavior shifts with climate, hormones, and products. A seasonal retest is a good habit to build.
Can I have more than one skin type at the same time?
Yes, absolutely. Combination skin is very common, where your face shows traits of two or more types. A shiny T-zone with matte cheeks is the most typical pattern and is completely normal.
What should I do if my skin feels irritated after testing?
Take a break from all products, go back to basics, and give your skin a few days to settle. If redness or irritation persists, expert evaluation can help distinguish a skin type reaction from a condition like rosacea or eczema.
Can products I used last week affect my test today?
Yes, they can. Recent use of strong actives or unfamiliar formulas can temporarily alter your reading. Baseline skin behavior is best observed on typical days when no new products have been introduced recently.
Recommended
- Detoxify your skin at home: simple routines for results – SMPL SKIN South Africa
- Know your skin type for better hydration and care – SMPL SKIN South Africa
- How to choose skincare products for a simple routine – SMPL SKIN South Africa
- Skin health explained: simple science for better results – SMPL SKIN South Africa
- Sensitive skin routine guide: Soothe, strengthen, protect – Body Face Scalp